

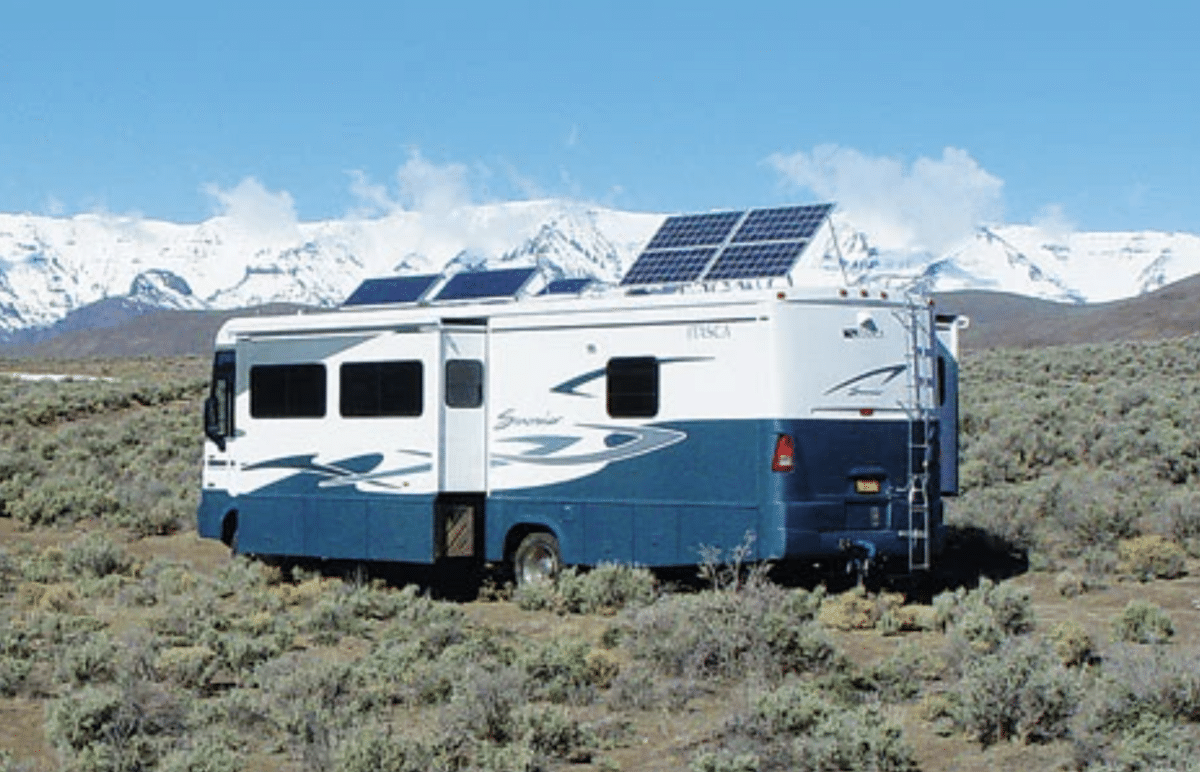
Just because you want to camp off-grid, doesn’t mean you don’t want electricity to power your toaster and have lights at night!
While you could always grab a gas generator to power your RV, they are loud, require fuel, and are even banned in some campgrounds.
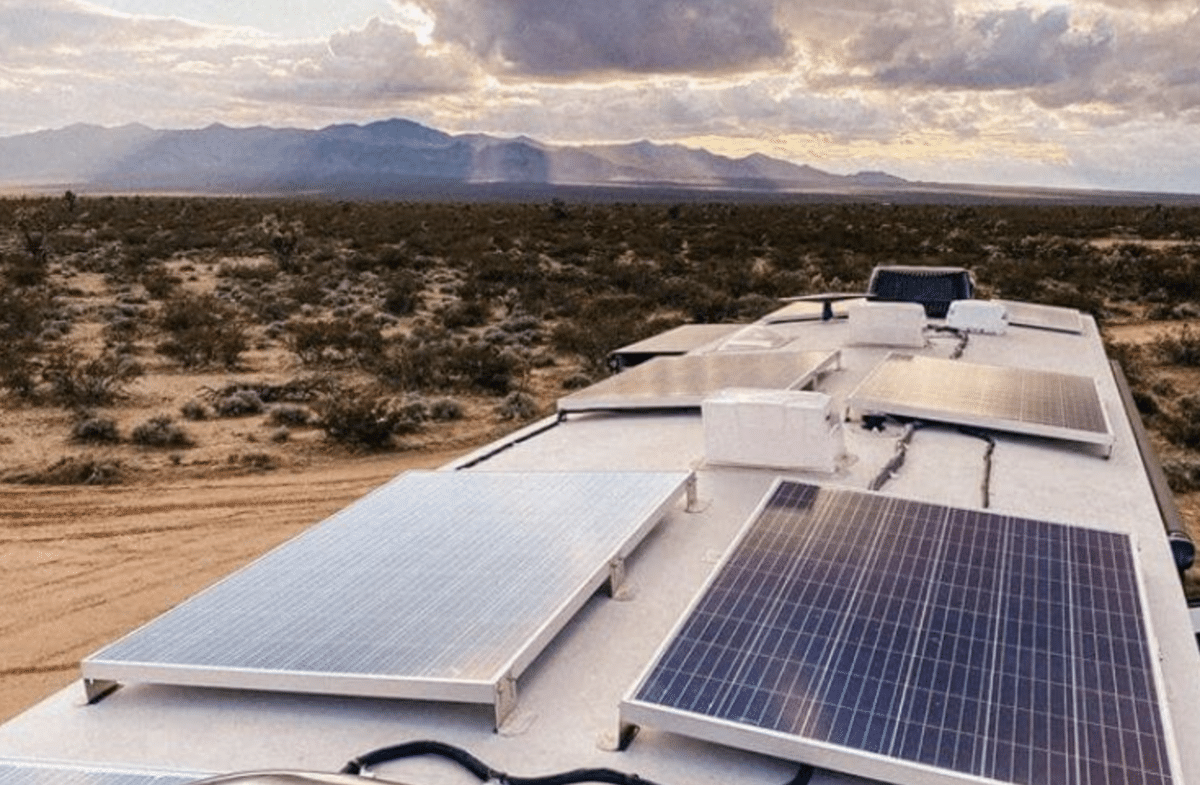
If you plan on boondocking and still want to have electricity, a solar setup could be the answer.
But which panels should you buy? How do you install them? What other equipment do you need to make them work?
We answer all these questions and more in today’s guide.
Table of Contents
- Just Curious About The Best Panel? Look at These
- What Are RV Solar Panels and How Do They Work?
- The Three Types of Solar Panels
- Permanent vs. Portable Solar Panels
- How Many Solar Panels Do You Need?
- Our Top 3 Picks for RV Solar Panels
- RV Solar Setup Components
- How to Install Your Solar Panels to Your RV Battery
- Frequently Asked Questions
Just Curious About The Best Panel? Look at These
Renogy 400 Watt 12 Volt Solar Premium Kit
- The Premium Kit will produce an average of 1.6-2.5kWh of electricity per day
- Advanced encapsulation material with multi-layered sheet laminations to protect cells from physical damage or distortion, improving cell performance and providing a long service life
- Pre-drilled holes on the back frame allow quick installation
BougeRV 400 Watt 12 Volt Solar Kit
- 9BB Cell Design. More Busbar, More Power. BougeRV 200W solar panel uses the high-level 9BB cell design which has a 22.8% highest conversion rate
- No visible defects and any microcracks, BougeRV 200 watts solar panel passes the strict EL test
- Compared to other 200W solar panels, BougeRV 9BB 200W solar panel is about 8% smaller but it could power the same or even more
What Are RV Solar Panels and How Do They Work?
To put it simply, a solar panel (also known as a PV panel or module) is a device that captures the sun’s energy and converts it into electric current.
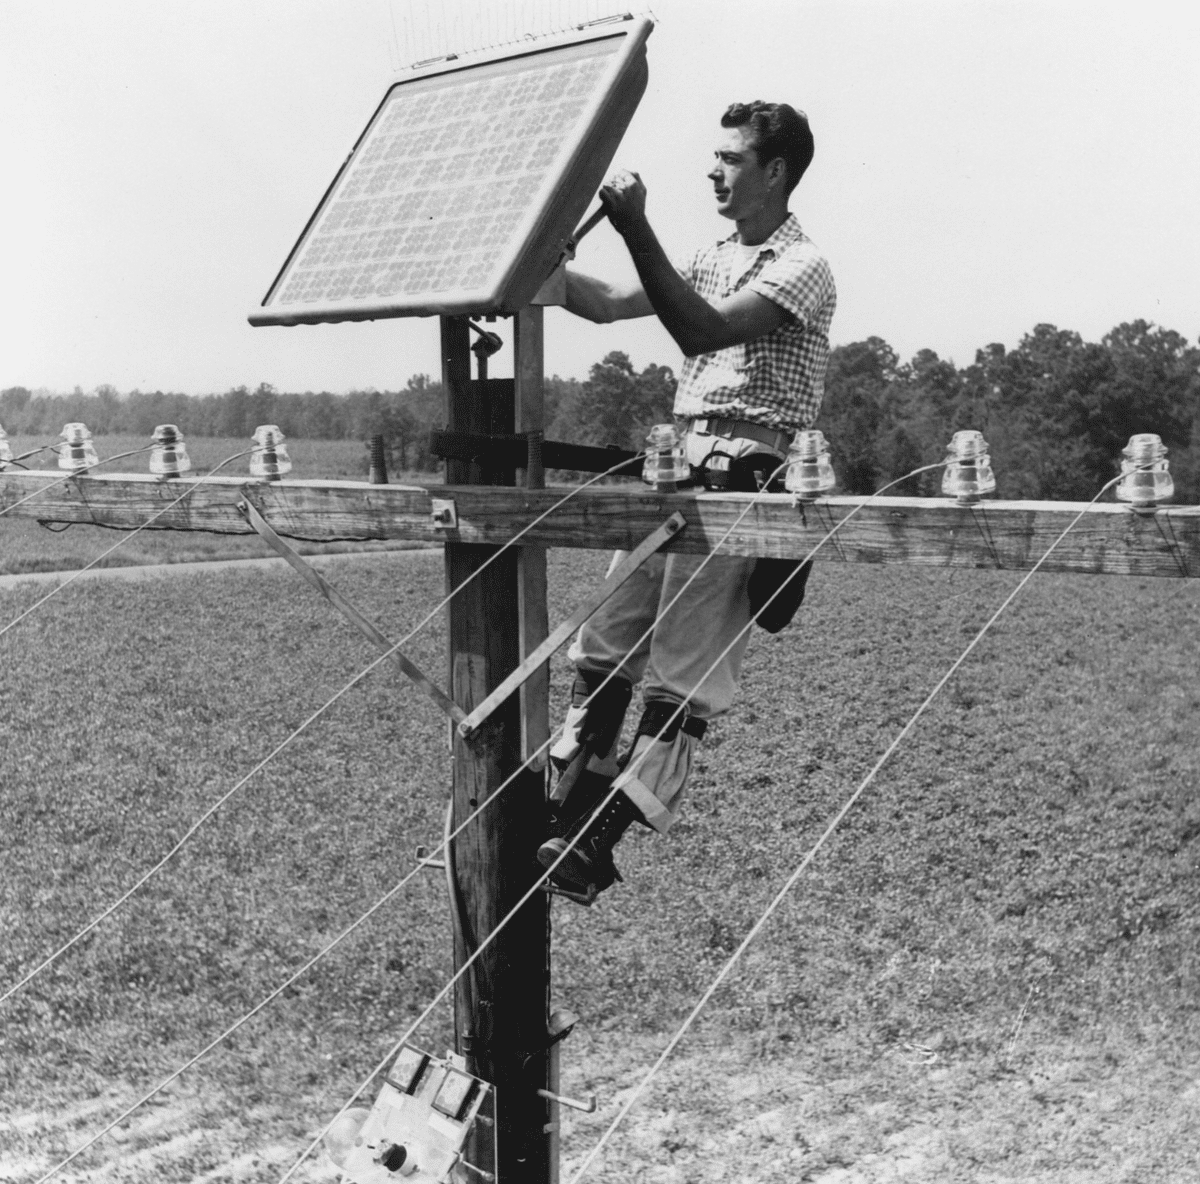
A longer, more in-depth answer? In the 1800s, scientists observed something known as the photovoltaic effect (a physical and chemical phenomenon) which showed that some materials were able to generate voltage and electric current upon exposure to light.
There were multiple attempts made over the years to create these solar engines, but nearly all of them proved to be inefficient. In the 1950s, however, scientists discovered that the silicon found in sand could create a more efficient solar panel! This discovery led to the development of solar cells able to harness the sun’s energy while turning it into electricity.
While technology has changed a few times over the years, the concept remains the same! Here’s what one of the first-ever solar panels looked like:
Now that we know what a solar panel is, let’s talk about how solar panels work!
If you park your RV in direct sunlight during the day, the sunlight will charge the solar panels, allowing the cells within the solar panels to absorb the sun’s energy.
Within the cells inside the solar panels, there are circuits. These circuits take the energy that was absorbed by the sun and turn it into direct electrical current (DC). This current is then fed through wires to a charge controller that controls the input from the panels to the battery unit in your rig (check out our guide to your RVs electrical system to learn more).
This is essentially what that looks like:
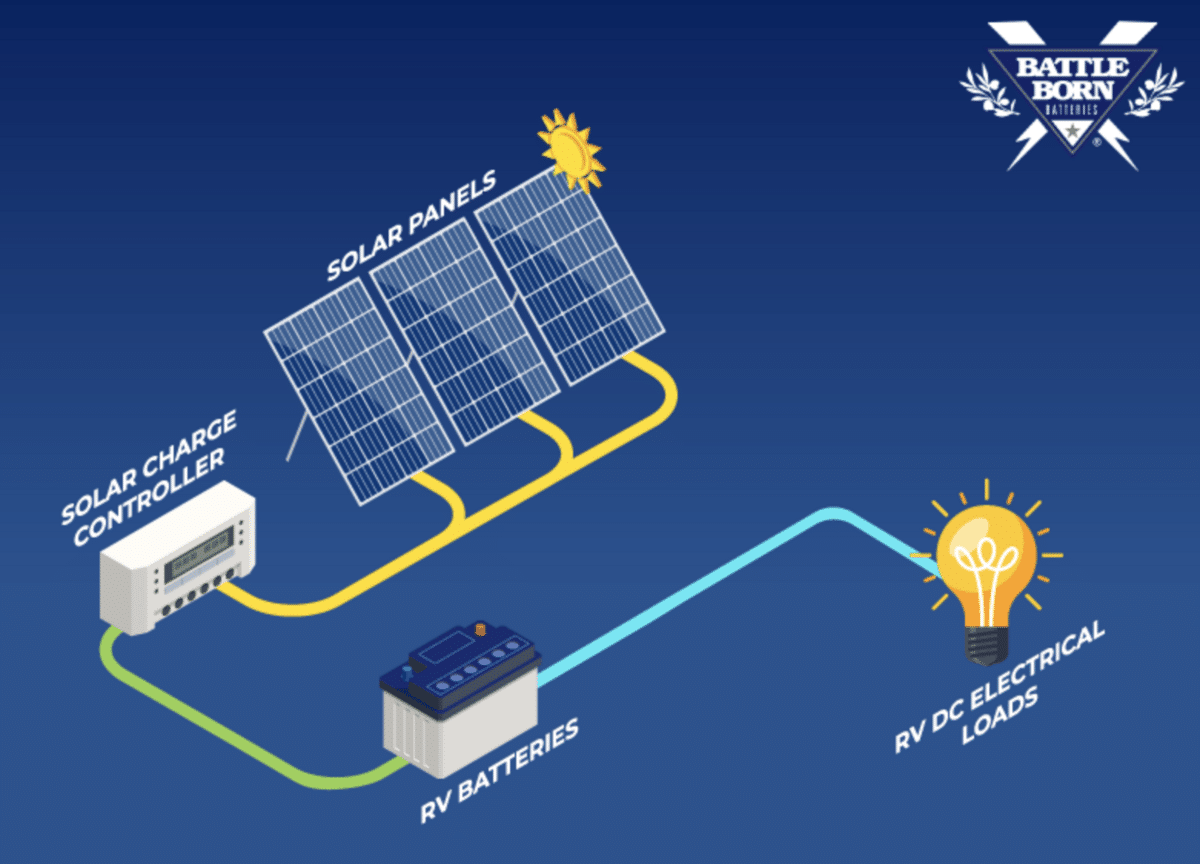
The energy you get from this process becomes direct current (DC) electricity. This is what’s able to charge your RV’s battery, storing energy to be used to power things in and around your RV at a later time.
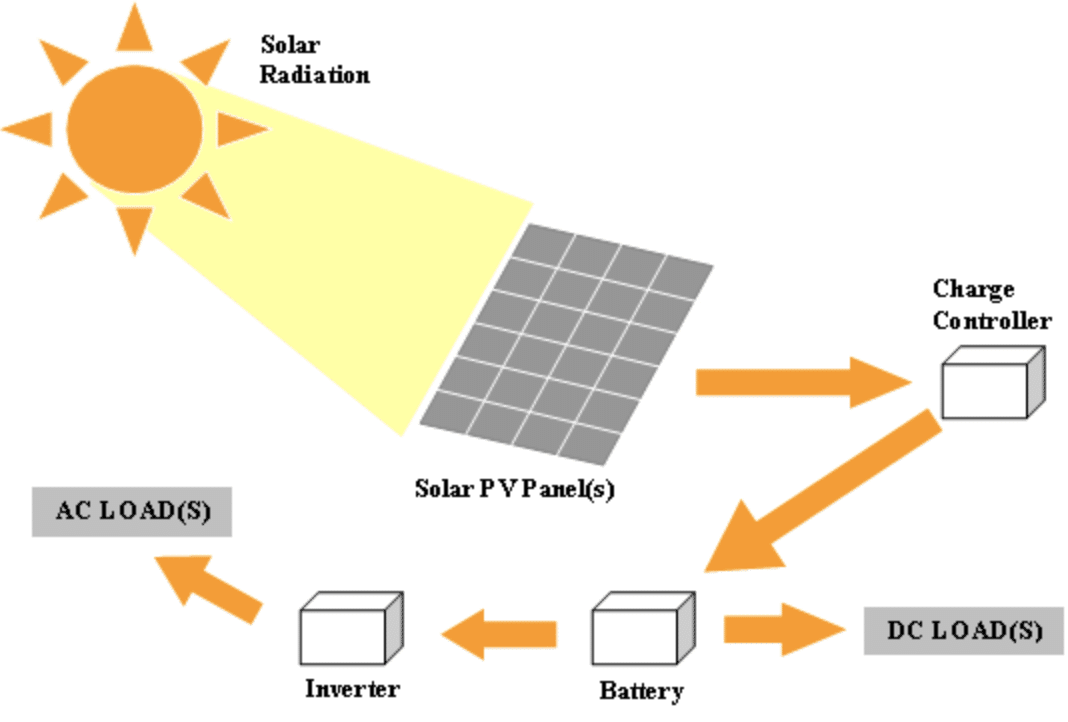
Typically, the DC power from solar panels is converted to 12 volts. This is able to power some things within your RV. However, if you want to power a 110-volt outlet like those used for most household appliances, you need to take that 12-volt DC and pass it through an inverter, which will convert it to 110-volt alternating current (AC) electricity, allowing you to power 110-volt devices like a coffee pot or refrigerator.
Within your RV, you’ll find 110-volt outlets all around. These outlets will not have power unless you’re using a generator or your RV is plugged into shore power.
If you plan on boondocking and want to be able to use your 110-volt appliances, you’re able to do that! The sun’s energy found within the RV solar panels will go through the charge controller, then the batteries, then the inverter. After that, you’ll be able to use 110-volt electricity when you want it! Check out this diagram to see what that looks like:
Realistically, you’re able to power pretty much anything with solar power, although it will be hard to generate enough electricity to run an air conditioner or heater for any useful amount of time.
Fun Related Reading: How Many Solar Panels Would it Take to Power the US?
The Three Types of Solar Panels
There are three types of solar panels to know about:
- Monocrystalline Solar Panels
- Polycrystalline Solar Panels
- Amorphous Solar Panels
Let’s dive a little deeper into each one and figure out which solar panel is best for you!
Monocrystalline Panels
Monocrystalline solar panels are the oldest, most developed type of solar panels. They’re made from single (mono) crystal (crystalline) silicon solar cells which is where the name comes from!
In order to make these solar cells, pure silicon is formed into bars and cut into wafers. During this process, the cell edges are cut off and made to be rounded and smooth which helps the solar cells produce more electricity. Some may say that this is time-consuming and wasteful, but it does give these solar panels a more recognizable appearance!
Monocrystalline solar panels are made from the highest purity of silicon which makes them a premium panel. They’re the most sought-after because they tend to last longer and have a higher efficiency rate (typically between the 15 to 20 percent range). Because the cells are composed of a single crystal, they have a higher power output as well.
Polycrystalline Panels
Polycrystalline panels are a more affordable option, but they’re less efficient than monocrystalline solar panels.
Similar to monocrystalline solar panels, polycrystalline cells are made from silicon. The difference is that the cells are made from many (Poly) fragments of silicon crystals melted together. This makes them have a shorter lifespan as well as less efficiency. They’re unable to generate as much electricity from the sun because there’s less freedom for the electrons to move (thanks to how many crystals are in each cell).
These solar cells are made by melting raw silicon together and pouring it into a square mold. The sides aren’t cut as they are with monocrystalline solar panels which is better for the environment since there’s less waste.
Amorphous Panels (AKA Thin-Film Solar Panels)
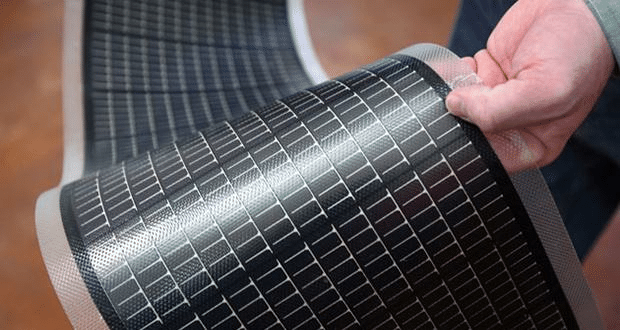
Unlike monocrystalline and polycrystalline solar panels, amorphous solar panels (also known as thin-film solar panels) are thin, flexible, and low in profile. The cells within these panels are 350 times thinner than the crystalline wafers used in the other two types of solar panels!
These solar panels are manufactured from layers of semiconducting materials like silicon, cadmium telluride, and copper indium gallium selenide. The semiconductor layer is placed between transparent conducting layers with a very thin layer of glass on top which helps capture sunlight.
These types of solar panels have lower efficiencies when compared to crystalline panels. While monocrystalline solar panels tend to stay within the 15 – 20 percent efficiency range, amorphous panels only reach around 11 percent at best. They also require a lot more roof space in order to generate a large amount of solar energy.
They degrade quicker than crystalline panels, too. However, they could be a good choice for you if you want to put them on an awkward RV roof where placing flat, rigid panels is more difficult. They also don’t require you to mount them on the roof with holes, which means less cutting into your RV roof and less chance for leaks.
Related Reading: These Are the Best RV Roof Sealants & Coatings
What Type of RV Solar Panel Should I Get?
Picking out the best RV solar panels for you depends on your budget and where you plan on using it. Monocrystalline solar panels are best for smaller roofs due to their price of them. Polycrystalline solar panels are great for larger RVs that can fit more panels as you’re able to purchase more for less money.
Thin-film solar panels are good for commercial buildings, but don’t last long and require a ton of roof space in order to generate a large amount of solar energy.
We would recommend purchasing monocrystalline solar panels if you’re able to afford it! Not only do they last the longest, they’re also the most energy efficient and have a higher output overall.
Permanent vs. Portable Solar Panels
Permanent solar panels (AKA fixed) are installed directly on your RV rooftop. Some advantages of having fixed panels are:
- Set up – If you’re looking to simplify your campsite setup, you might prefer the convenience of fixed-panel rooftop solutions. Portable systems require setup and tear down at each location, which does add time and work to every stop.
- Storage – While portable panels must be stowed safely when not in use, fixed panels stay in one place. As power requirements (and the number of panels) grow, storage can become more challenging.
- Mobile charging – RVers with fixed solar systems are able to enjoy charging their batteries anytime the sun’s out, even while traveling! Portable systems don’t offer the same convenience and can only be used when RVs are parked.
- Scalability – It’s easier to accommodate more power with fixed systems. Many RVs and trailers can have up to 1,000 watts of solar panels on their roof, but most wouldn’t want to set out and store the equivalent number of portable panels.
- Security – Permanent rooftop panels are relatively safe, whereas portable panels can be dropped, knocked over, or stolen if left unattended.
Portable solar systems, however, are optimized for size and weight. This type of panel isn’t roof-mounted, it’s stored in the RV and only used when the RV is parked.
Some advantages of portable solar systems are:
- Flexibility – With portable systems, you’re able to park in the shade or in a spot that affords the most scenic views while charging the RV’s batteries with a portable panel placed in the sun.
- Optimal sunlight – Portable panels can be moved throughout the day to maximize their exposure to the sun, keeping the best possible charge coming in.
- Cost – While portable panels can be more expensive than their rooftop counterparts, they can be cheaper once installation costs are factored in.
- Ease of use – You don’t have to drill holes, mount panels on the roof, or run cables through the RV. You can also move the panel from one RV to another without much hassle, should you choose to upgrade.
- A good introduction to solar – RVers who aren’t ready to install a fixed solution can begin reaping the benefits of solar with an entry-level portable solar kit.
At the end of the day, it depends on what works best for you!
How Many Solar Panels Do You Need?
Before you head out on a long camping trip, you should figure out how many solar panels you’ll need while on the road. Because of this, we’ve thought of two important questions for you to ask yourself:
- How many watt-hours will you use each day? (This is how much energy you plan on using).
- How much energy do your solar panels provide your battery/batteries? (This is how much energy will be collected and stored).
In order to have an optimal RV solar system, you’ll need to know the answers to these questions. Don’t worry—we’re here to help you figure it out!
If you purchase RV solar panels without having enough batteries to store all of the power produced, you’ll end up wasting money while not providing the amount of power you need. On the flip side, having one RV solar panel system and a ton of RV batteries won’t allow enough of the sun’s energy to be harnessed and fill these batteries.
Let’s dive a little deeper into each question.
Calculating How Much Energy You Use
First off, let’s figure out how much energy you use in a day. Grab your pen and paper, we’re about to do the math!
To properly estimate how much power you’ll consume while boondocking, you’ll need to learn how much each device or appliance you’ll want to use consumes per day. From there, multiply that by the number of hours, you’ll use that device or appliance.
Here’s an example:
Say you bring your laptop to work while on the road and charging it consumes 90 watts. You estimate that you’ll work for about 4 hours per day. So, 90 watts x 4 hours = 360 watts per hour per day.
You’re able to do this equation with each appliance and device you plan on using. Once you have, add the total watts/hours consumed and you’ll have a roundabout estimate of how many watts you’ll use per day, and thus, how many RV solar panels you’ll need.
For example, if you find you use 1,000 watts per day, and you typically have 3-4 perfect hours of sunlight in a given day, you’d probably want at least 200 watts of solar panels to keep the battery charged nearly indefinitely (assuming you don’t have too many overly cloudy days in a row).
Calculating Energy Generation and Storage Needs
There are two methods that you’re able to use when trying to calculate storage needs and energy generation:
- Use your RV and add monitoring, or
- Do the calculations by hand
Both methods are good, but the second is slightly more complicated than the first. Let’s quickly dive into each method so you can decide which you’d like to use before installing RV solar panels!
1. How to Use Your RV and Add Monitoring
The first thing you’ll want to do (even before installing solar panels to your RV) is adding a battery monitor to the electrical system. This is one of the most critical pieces of an RV solar system. What you’re looking for here is your battery’s capacity. From there, you’ll be able to figure out how much energy you use.
Once your battery monitor is installed, make sure you fully charge the batteries. Once you see that they’re fully charged, turn off the charger and use your RV. Watch the battery power level with the meter and recharge them when they reach about 50% of their capacity with lead acid batteries or 20% with lithium batteries.
Note how long you ran before hitting these two numbers and mark what the Amp hours used from the battery meter says. From there, take the Amp hours consumed in said time and multiply that number by the system’s nominal voltage. This is typically 12.6V for a lead acid battery and 13V for lithium-ion batteries. This is how you get the Watt hours.
For example, 250Ah used times 12.6V would equal 3150 Watt hours.
Next, note how long it took before you had to recharge the batteries. If it was 12 hours, double that number of Watt hours to meet the needs of a 24-hour power source.
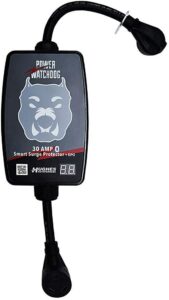
Once you have that number, it’s time to determine if you’ll be using an inverter to power the AC appliances (we talked earlier how your inverter takes battery power and converts it into an AC household current and powers things like computers, microwaves, and more). You’ll want to get an inverter that reads all power used by the RV, such as the one shown below:
Hughes Autoformers Inverter
- Portable 30 Amp Voltage and Amperage Monitor with Bluetooth monitoring
- 11.684 cm x 26.67 cm x 58.42 cm
- Weighs 5 lbs
Again, make sure your RV batteries are fully charged. Reset the energy counter on the inverter and use the RV as if you’re boondocking for at least 24 hours. Do not use your air conditioning or heat. Be conservative with all power use in order to minimize your solar needs.
At the end of 24 hours, check the reading on the meter. You’ll see the reading in Kilowatt Hours (kWh). From here, you’re able to take the Watt hour or the Kilowatt hour (which is the Watt hour divided by 1000) to see how much solar energy you need.
2. Do The Calculations By Hand
We don’t typically recommend you do this to figure out exactly how much energy generation is needed, but if you’re just looking for a ballpark number, this method will work.
All you have to do is figure out what each appliance uses for power then multiply it by the amount of time it’ll be operational. Write everything down and add up the result at the end. This method is much more error prone, but it can give you a rough estimate.
Note: Keep in mind that your RV solar system will only give you the stated number of Watts under perfect conditions. Perfect conditions = direct sunlight pointing directly at the RV solar panels. On rainy or cloudy days, you won’t get 100-Watts from a 100-Watt solar panel.
Our Top 3 Picks for RV Solar Panels
When it comes to buying RV solar panels, you’ll want the best of the best. Whether you plan on permanently installing a solar panel kit or plan on purchasing a portable solar panel, we’ve got you covered!
Related Reading: Top 3 Solar Generators for Off-grid Living
Best Premium: Renogy 400 Watt 12 Volt Solar Premium Kit
Renogy 400 Watt 12 Volt Solar Premium Kit
- The Premium Kit will produce an average of 1.6-2.5kWh of electricity per day
- Advanced encapsulation material with multi-layered sheet laminations to protect cells from physical damage or distortion, improving cell performance and providing a long service life
- Pre-drilled holes on the back frame allow quick installation
The Renogy 400 12V Premium RV solar kit is easy to install and is one of the most economical choices for the off-grid adventurer. It comes with everything you’ll need including:
- Solar panels
- Charge controllers
- Electrical wiring
- Fuses
- Monitoring required for an off-grid installation
With this RV solar kit, you’ll be able to produce an average of 1.6-2.5kWh of electricity per day (depending on sun availability). On top of that, the solar panels don’t take up too much roof space.
The Renogy 400 is reliable, environmentally friendly, and is perfect for all rooftops, RVs, boats, and campers. You can also buy just the panels if you already have the other things you need.
Best Budget: BougeRV 400 Watt 12 Volt Solar Kit
BougeRV 400 Watt 12 Volt Solar Kit
- 9BB Cell Design. More Busbar, More Power. BougeRV 200W solar panel uses the high-level 9BB cell design which has a 22.8% highest conversion rate
- No visible defects and any microcracks, BougeRV 200 watts solar panel passes the strict EL test
- Compared to other 200W solar panels, BougeRV 9BB 200W solar panel is about 8% smaller but it could power the same or even more
BougeRV is committed to creating a sustainable future for human beings by offering one-stop solar product solutions and with their BougeRV 400 Watt 12 Volt Solar Kit, they’ve certainly done just that!
This high conversion solar panel comes with the latest 9BB technology, is more environmentally friendly than most, and is virtually silent. Not only does this RV solar panel help to reduce your carbon footprint, it also saves space!
We currently have the 400 watt kit set up on our camper van conversion build and it’s worked extremely well. We love how affordable it is! Check just the panels here.
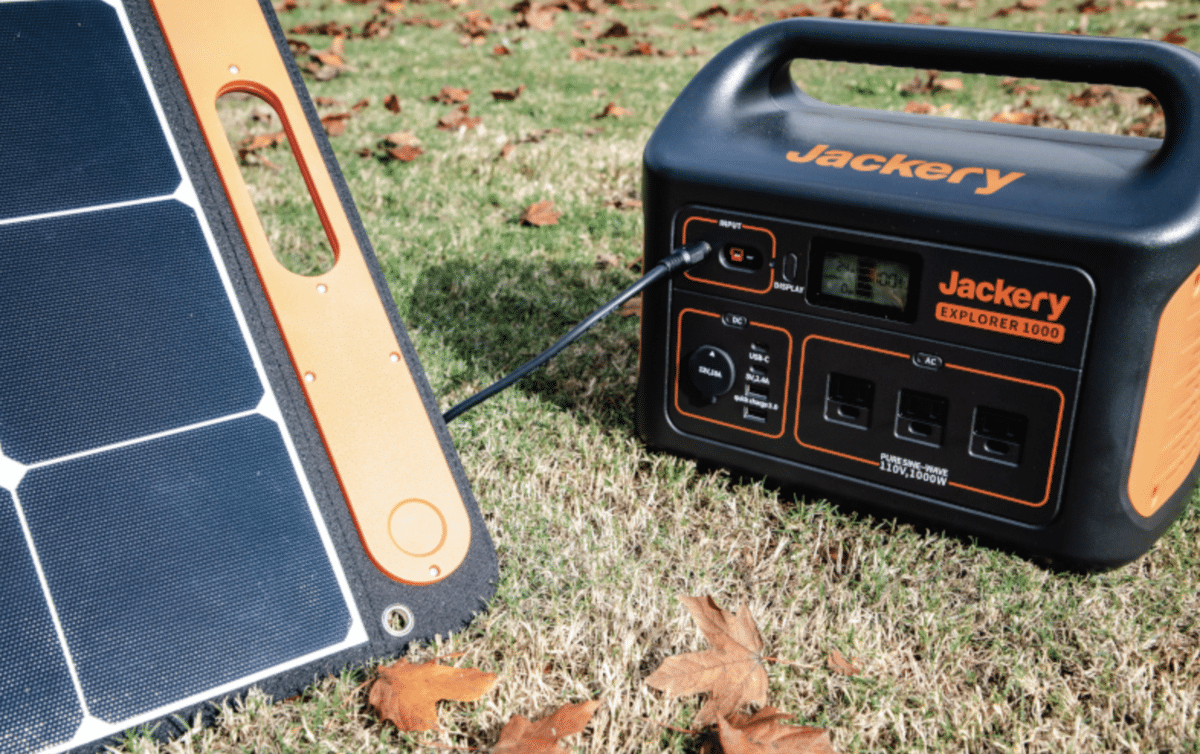
Best Portable: Jackery SolarSaga 100W Solar Panel
Jackery SolarSaga 100W Solar Panel
- The Solar Saga 100 features 2 kickstands that can be placed firmly on any surface ground
- Covered by monocrystalline silicon solar cells, the solar panel adopts multi-layered cell technology to generate energy from the sunlight and perform better with higher conversion efficiency that up to 23% than other conventional panels
- The ETFE-laminated case is durable enough to extend the lifespan of the solar panel.
The Jackery SolarSaga 100W Monocrystalline Solar Panel stays charged with the power of the sun! It has a high conversion efficiency up to 23% and only weighs 9.1 lbs (which is a huge plus for portability—some of the portable panels we’ve used weigh nearly double that and are extremely cumbersome to use.)
It’s lightweight, foldable, and comes with an easy-carry handle that makes it even more portable! Easy to use, portable, and efficient; what more could you want?
The only downside is that Jackery uses a unique plug on their panels that only plug into a Jackery and won’t work with other solar setups.
Related Reading: Jackery Explorer 1000 Portable Power Station Review
RV Solar Setup Components
So, what do you need for your RV solar power system? We’re glad you asked! Essentially, you’ll need:
- RV solar panels
- A battery bank
- A charge controller
- An inverter
Let’s talk a little bit about each one of these components.
RV Solar Panels
As we mentioned before, you’re able to get RV solar panels that permanently sit on the roof of your RV or you’re able to get foldable solar panels. Both collect energy from the sun and transfer that energy through a charge controller into your battery bank.
You’re able to lay these RV solar panels flat or at an angle. As long as they face the sun, you’re good to go!
Battery Bank
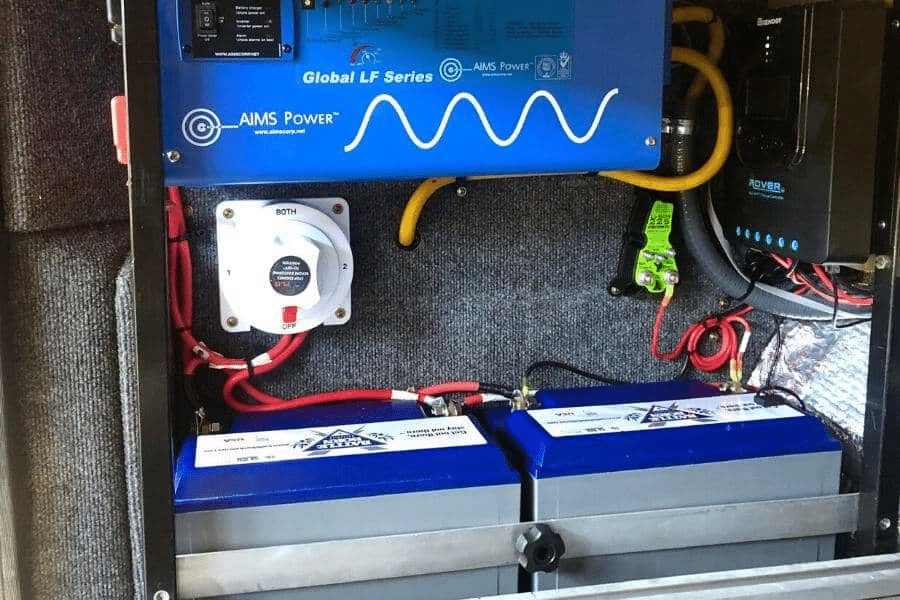
Think of the battery bank as the heart of an RV’s power system. Without a battery, the RV has no way to store power (whether this power is provided by the sun or not).
Solar panels charge the battery bank, but not all batteries are created equally! Check out our guide on the best RV batteries to figure out which would work best for you!
Charge Controller
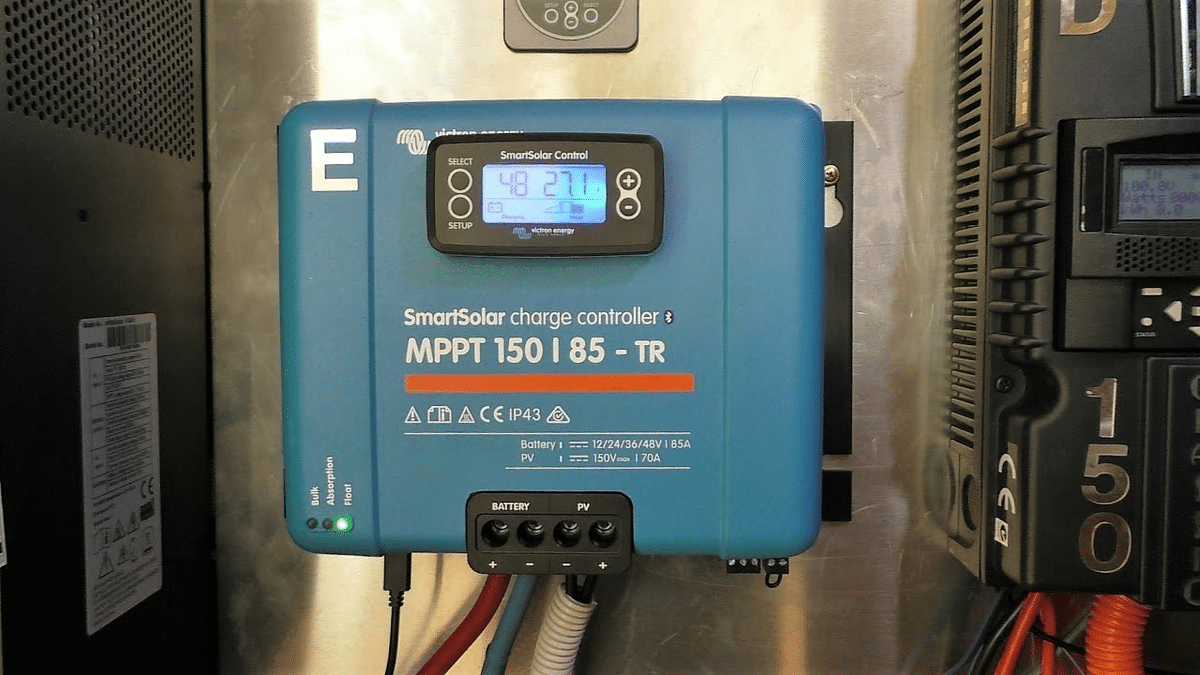
The charge controller is mounted inside your RV. It has wires that run from your solar panels to the charge controller and from the charge controller into your battery bank.
Your charge controller is able to control the rate at which your batteries charge which is required to prevent overcharging while operating the panels as efficiently as possible.
AC/DC Inverter
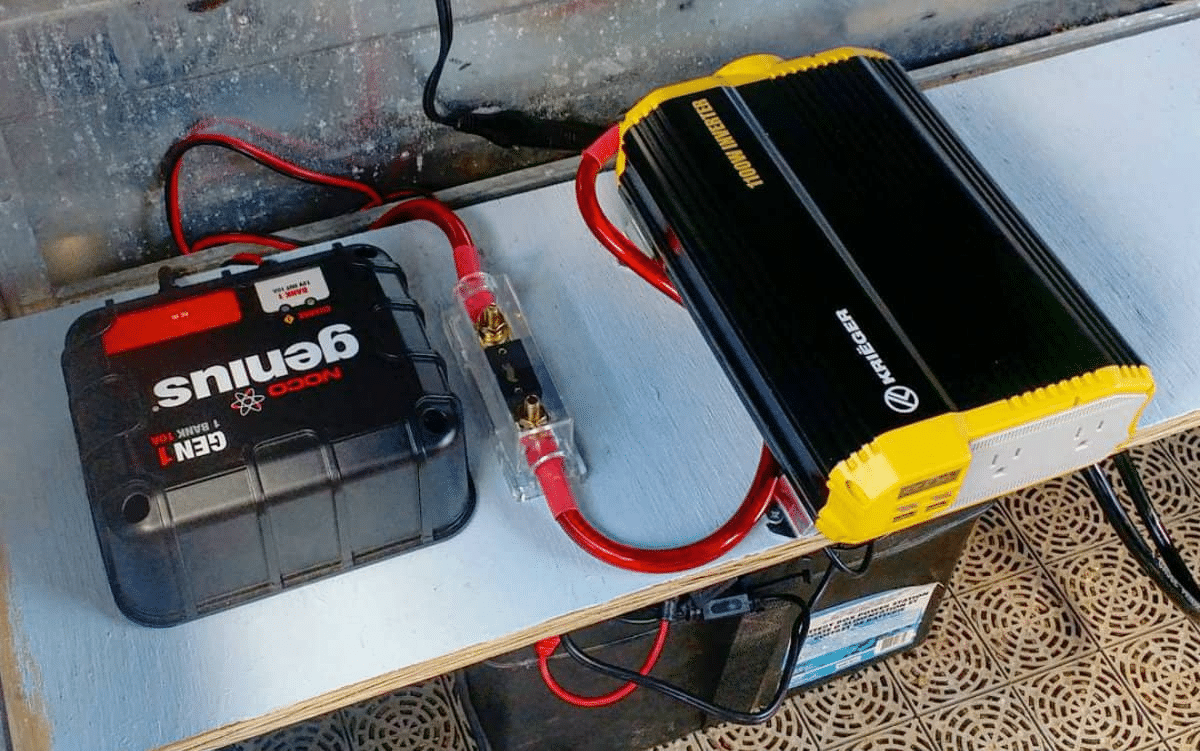
Like we said before, the electricity from your RV batteries is 12-Volt DC electricity. You’re able to power 12-Volt devices within your RV with this.
If you want to use 120-Volt AC electricity to be able to use your outlets, a toaster, coffee maker, laptop, or anything that requires AC you need an inverter to transform your 12-Volt DC power into 120-Volt AC power.
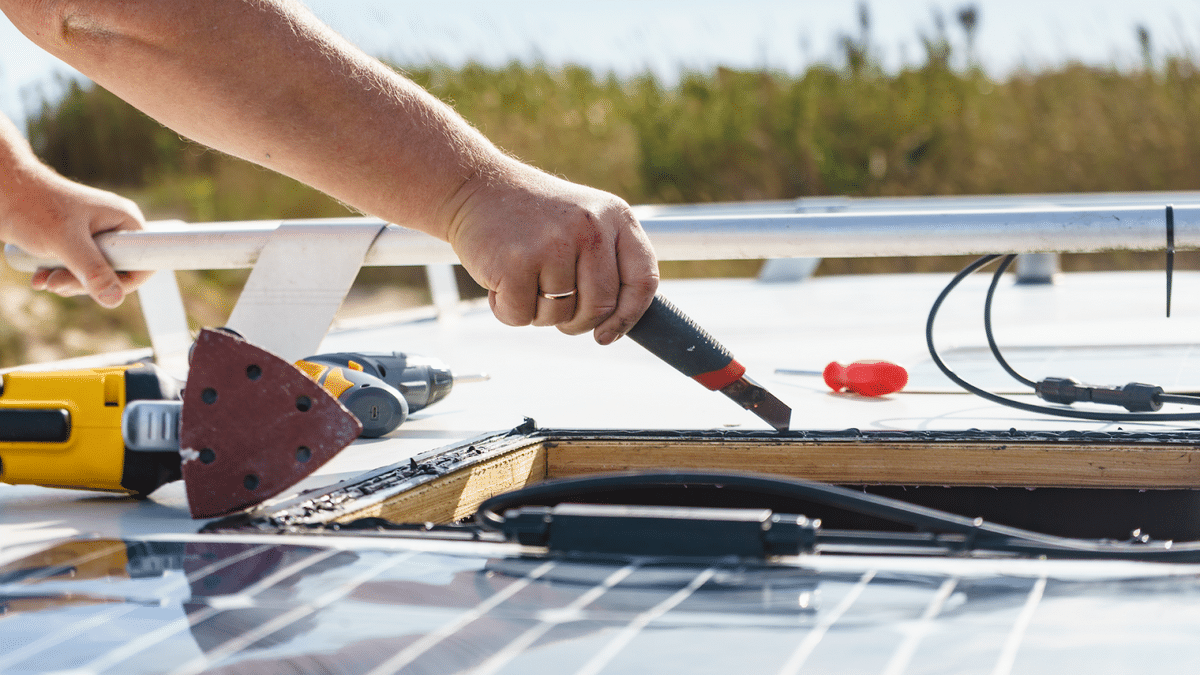
How to Install Your Solar Panels to Your RV Battery
Alright – it’s time to install your solar panel system! This is a huge job and if you’re feeling uncomfortable in any way doing this yourself, be sure to bring your RV to a professional to have it done.
However, you are more than capable to do it yourself and to help, we’ve come up with a list of steps to get the job done right the first time around. Here’s what you have to do:
- First, mount your solar panels on the roof of your RV.
- Next, mount your charge controller inside the RV as close to your batteries as possible.
- Run your wiring from the solar panels into the RV and over to the charge controller. (You’re able to run your wiring through a refrigerator vent or through the holes where the plumbing enters the RV if they’re located near your batteries. If not, simply drill a hole through the roof of your RV to run the wires and thoroughly cover and caulk any drilled holes.) You should install a fuse or circuit breaker on the wires for this run, too.
- Connect the wires from your charge controller to your battery bank. A fuse slightly larger than the charge controller’s rated current should be installed on these wires.
- By now, the system is fully installed. However, the RV solar panels are not connected to the charge controller. Double-check all wiring to make sure polarity (positive and negative) are all correct. Once confident, plug in the solar panels to the charge controller. We recommend doing this at night or with the solar panels covered by a blanket to prevent a spark.
- This step is optional, but if you want to use 120-Volt AC appliances, you’ll want to mount an inverter inside your RV, as close to the batteries as possible, and run appropriate wiring to that inverter.
If you’re more of a visual learner, check out this video from Forrest:
Frequently Asked Questions
We’ve pretty much talked your ear off by this point about RV solar panel kits. But, there are two questions we wanted to touch base on before sending you off!
Do You Need To Use RV-specific Solar Panels?
Nope, not at all!
In fact, any type of solar panel can be made to work with your RV. There may, however, be a few challenges that you’ll face.
The first (and most obvious one) being space. Depending on the air conditioning you have (or an additional WiFi booster), you may be limited to how much space you have on the roof. If your roof is wide open, full-size residential panels can be used on your RV.
The other challenge you’ll face by using non-specific RV solar panels is the voltage in which they operate at. Many RV solar panels operate between 17 to 20 volts, which works with most PWM charge controllers to charge a 12-volt system. However, home solar panels operate between 40 to 70 volts and are unable to be used with a PWM charge controller.
In instances like this, you’re able to use an MPPT style controller as long as it has a high enough voltage rating.
Are RV Solar Panels Worth It?
Well, that depends on your camping style. If you typically camp at campgrounds or RV resorts, maybe not. You’ll be paying for electrical hookups to power your RV and appliances while there.
However, if you plan on boondocking and don’t want to drain your generator, yes! They’re well worth it. Solar panels are able to provide silent power and are environmentally friendly. All you need is the sun and your electrical needs will be covered!
We hope that this guide on RV solar panels has helped you! We’ve talked about how RV solar panels work, different types of solar power, and so much more!
As always, if there’s a question you have that we haven’t answered in the content above, make sure to leave us a comment down below!