

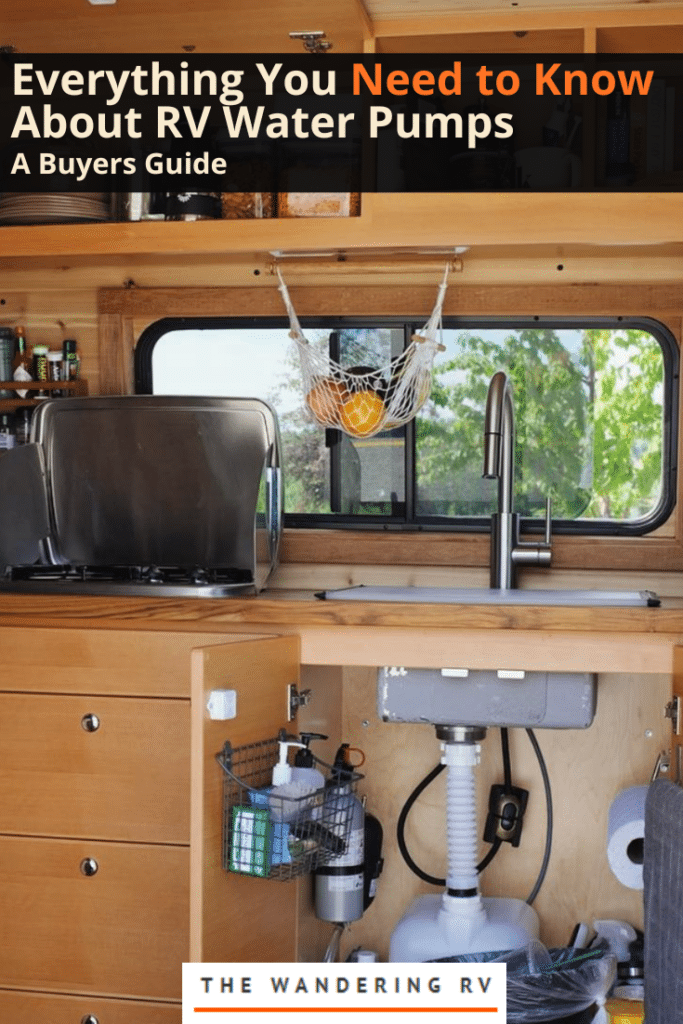
You know what sucks?
Turning on the water in your camper’s shower… only to have nothing come out.
Now you’re naked, cold, and very sad.
Buying an RV water pump is usually a spur-of-the-moment decision like this, since it’s normally working and you don’t really need to think about it.
But don’t buy one before you read this – there are some things you need to know.
Note: Before you drop hard-earned cash on a new pump, make sure yours is actually beyond repair.
Check out this guide to learn about RV water pump troubleshooting. Now, let’s dive in.
Table of Contents
- RV Water Pump Voltages: Which Do You Need?
- What Should You Look For When Buying a 12V RV Water Pump?
- Top 5 Best RV Water Pumps
- How to Replace Your RV Water Pump
- Final Thoughts
Note: Some of the links in this article are affiliate links. This doesn’t cost you any more than normal. Read our disclaimer for more info.
RV Water Pump Voltages: Which Do You Need?
While there are solar and fossil-fuel-powered pumps, the most common types you’ll find for your rig are good ol’ electric. Specifically, there are three common voltages:
- 12V
- 110V
- 120V
Note: RV water pumps are always 12V. The higher voltage models are made for sticks and bricks (what us RVers call residential houses), and are far too strong for a camper water system.
This leads us to our next question…
What Should You Look For When Buying a 12V RV Water Pump?
When it comes to comparing the best RV water pump, there are six main things to look at:
- Water Pressure (PSI)
- Water Pump Flow Rate (GPM, also known as gallons per minute)
- Noise
- Thermal Protection
- Pump Size
- Amperage (AMPS)
Let’s briefly talk about each of these (and why they’re so important):
Water Pressure (PSI)
When you go to buy an RV water pump, it’s incredibly important to find with with a PSI between 40 and 70 for a smooth flow and optimal water pressure.
Anything below 40 PSI will have insufficient pressure and anything above 70 PSI could burst your RV’s pipes, causing leaks and could loosen connections within the plumbing system.
Water Pump Flow Rate (GPM)
Your water pump flow rate essentially tells you the flow rate of the water. A higher flow rate equals more consistent flow of water pressure (and it allows more than one faucet to be on at a time).
Keep in mind that while a higher flow rate is able to deliver water to more faucets, it does require more power and you’ll end up using a lot more water. A lower flow rate pump could help you save water (which would be extremely helpful when boondocking).
Noise
Even the best RV water pump can be noisy and vibrate a lot (which is pretty frustrating to listen to when in a tiny, cramped space like an RV or a camper van).
However, you can find an RV water pump that has good vibration damping and more diaphragm chambers which will be ten times quieter. Keep in mind that the better your RV water pump is, the more expensive it’ll be.
Thermal Protection
We highly recommend you look for an RV water pump that has thermal protection. When the water pumps get too hot, the thermal protection will help it to shut down. This not only protects the motor, it minimizes the risk of fires in your RV!
Pump Size
Not all RV water pumps will fit into your rig! While you can make slight modifications, it’s better to get the right size right off the bat.
Amperage (AMPS)
Amperage measures the amount of electricity an RV water pump needs to draw in order to work. Most RV water pumps draw very little electricity whereas high-volume RV water pumps can draw up to 15 amps of power.
Top 5 Best RV Water Pumps
Ready to purchase a new RV water pump for yourself? We’ve got you covered! Below are the top five best RV water pumps you can get on the market today!
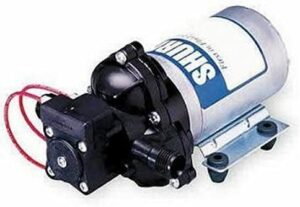
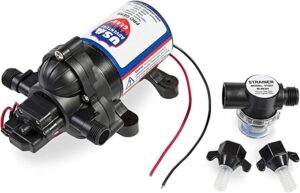
1. Shurflo RV Fresh Water Pump
At 12 Volts, 3.5 Gallons Per Minute, and 45 Psi, it’s easy to see why the SHURflo RV water pump is rated the #1 RV water pump on Amazon.
This RV water pump is known to be almost inaudible, the water pressure is said to be excellent, and the drinking water from it tastes great.
Shurflo RV Fresh Water Pump
- Positive Displacement 3 Chamber Diaphragm Pump
- Motor: Permanent Magnet, P/N 11-173-01, Thermally Protected
- Voltage: 12 VDC Nominal
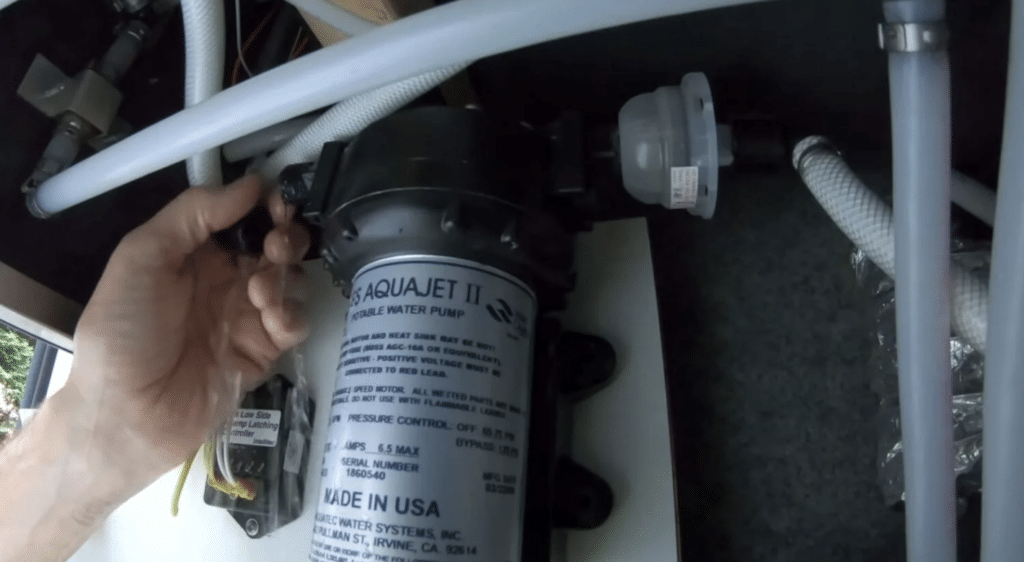
2. Aquajet RV Water Pump
The Aquajet RV Pump from Camping World employs state-of-the-art electronics to automatically control motor speed. This RV water pump actually adjusts its speed as you open and close water fixtures.
Aquajet’s soft start feature eliminates annoying rapid cycling and its exclusive 5-valve design can deliver twice the flow and pressure of conventional RV water pumps.
Aquajet RV Water Pump
- Automatically controls motor speed
- Soft start eliminates rapid cycling
- Silent operation and smoother flow
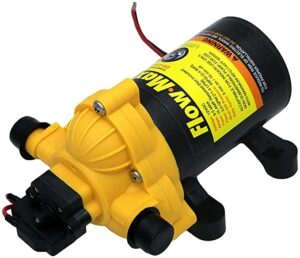
3. Flow Max RV Water Pump
The Flow Max RV water pump is a favorite among the RV community. Flow Max is able to deliver superior pressure performance and averages 50 PSI with 3 gallons per minute water flow.
This water pump also comes with a screen filter and two connectors. The filter prevents debris from entering the pump while the connectors connect flexible, high-pressure hoses to both the outlet port of the pump and the inlet port of the in-line screen.
Flow Max RV Water Pump
- Flow Max averages 50 PSI with an average of over 3.0 gallons per minute water flow
- Designed with a heavy-duty, corrosion-resistant motor
- Choose from a 12V or 115V configuration
4. ProGear RV Water Pump
If you’re looking for a good RV water pump, the ProGear RV water pump is where it’s at. This water pump works with most RV brands and it’s able to run dry without damage.
With an automatic shut off pressure switch and it’s quiet operation, you really can’t go wrong with this water pump.
ProGear RV Water Pump
- Turns on and off using water pressure at 45 PSI
- 12 Volts DC
- No pesticides, chemicals, or petrochemicals
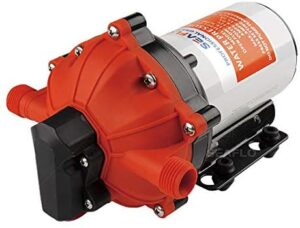
5. SEAFLO RV Water Pump
The SEAFLO RV water pump is one of the most heavy duty water pumps out there. It’s able to provide high volume water flow with reduced pump cycling and smooth flow thanks to it’s large five-chamber diaphragm.
This water pump is able to run dry without damage and has a built-in pressure switch that’s able to automatically start and stop the water pump when you open and close your faucet.
Note: This RV water pump works best when paired with the SEAFLO Accumulator tank (we’ve provided a recommended box for this down below).
SEAFLO RV Water Pump
- 12 Self Priming On Demand Water Pressure Pump
- 5.5 GPM and 60 PSI
- Ignition protected and thermally protected
SEAFLO Accumulator tank
- Includes Pump, Accumulator Tank, Fittings, and Strainer
- Run Dry Capable, Self-Priming, Reduces Cycling, Continuous Duty
- 4-Year Warranty
How to Replace Your RV Water Pump
Once you’ve purchased your brand new RV water pump, it’s time to change it out. While you could take it to an RV manufacturer to do this, it is pretty simple to do on your own (and we’re providing you with step-by-step instructions).
Don’t feel like reading step-by-step instructions? No worries, here’s a video you’re able to follow to replace your water pumps:
Let’s dive in!
Step One: Turn Off City Water Connection and Water Pump
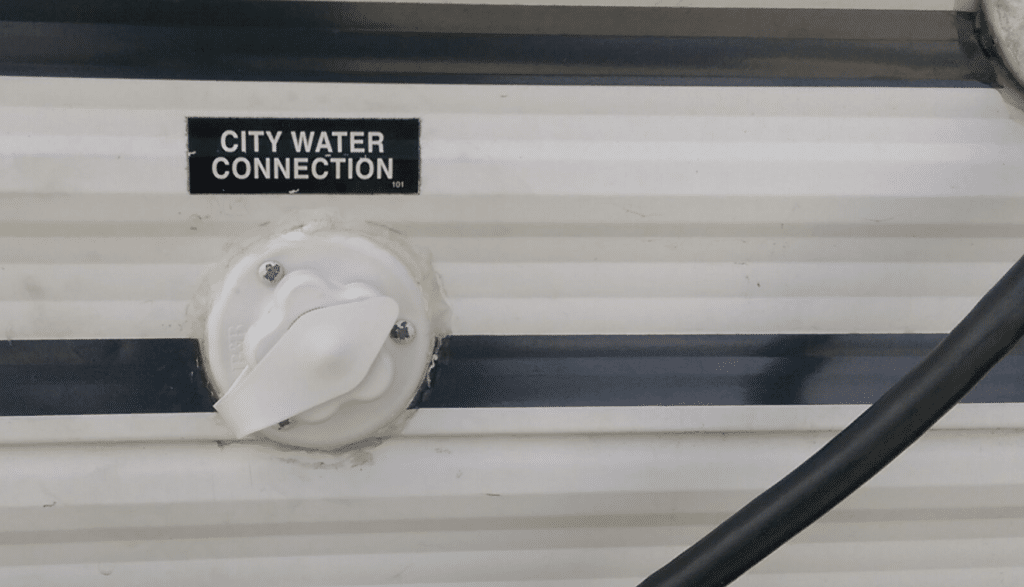
Whenever you’re working with your RV’s plumbing system, your first step will always be to turn off the city water (if you’re connected to that source). You also need to switch off the water pump.
Step Two: Remove the Water Pump Fuse
This is really just an added precaution, but you should remove the fuse that sends power to the water pump. You can find this on your 12V electrical panel.
Step Three: Turn On One of Your RV Faucets
While you could turn on all of your RV faucets to bleed out any excess water pressure in the RV plumbing system, you really only need to turn one on! Once one single faucet runs dry, you’re able to move on to the next step.
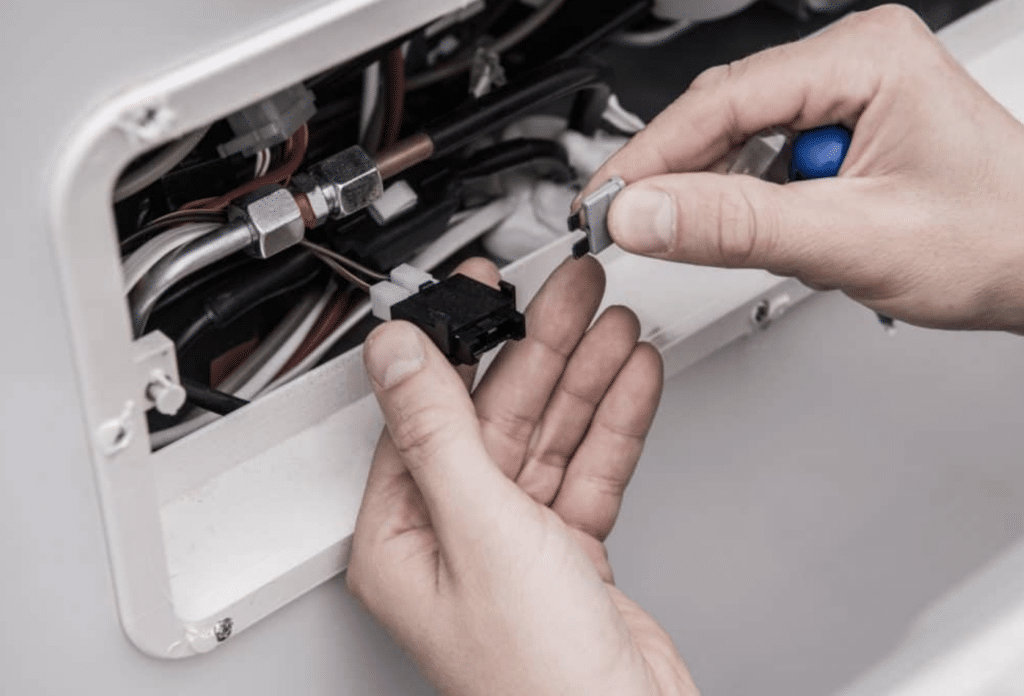
Step Four: Disconnect the RV Water Pump from the Latching Controller (if Applicable)
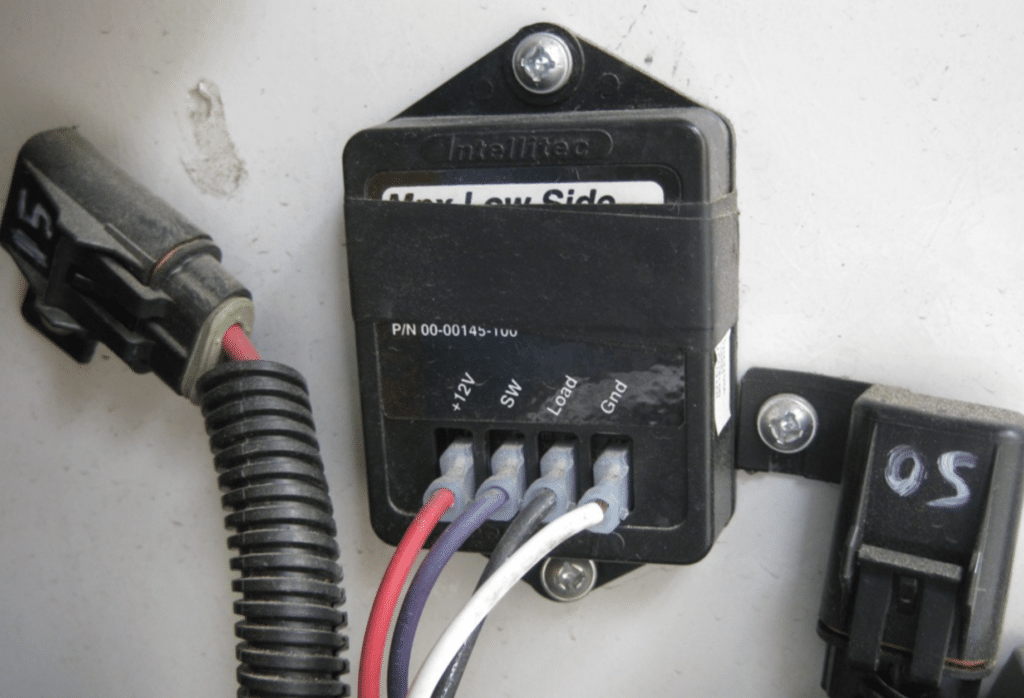
Your latching controller allows the RV to utilize multiple on/off switches for the RV water pump. If your RV has a latching controller, it’ll be located near the water pump.
You should see a box with wires feeding into various water pump switches throughout your RV (keep in mind that your RV will not have a latching controller if you have a single control for your water pump). To disconnect these wires, start with the water pumps ground wire from the latching controller (this is usually a black wire).
Then, remove the positive lead from the latching controller that goes over the to the water pump (typically this is a red wire, but it can also be yellow). Snip this red (or yellow) wire from the connector (you’ll reconnect it to the positive lead on the new pump).
Pro Tip: We recommend taking a picture of the wires within your latching controller before disconnecting, this way, when you reconnect the wires, you know exactly where they were and where to put them.
Step Five: Remove Inlet and Outlet Lines from the Water Pump
Place a bowl or a bucket underneath the pump before you unscrew it (water will leak out as you unscrew both the outlet and inlet lines).
Step Six: Remove Screws Holding the Water Pump in Place
After you’ve disconnected the inlet and outlet hoses, unscrew the water pump from its mount.
Step Seven: Remove the Inlet Filter (and Clean it)
You have to reinstall the inlet filter from the old pump onto the new one. Once detached, open the filter (it should just twist apart) and clean any debris found inside.
Note: If you notice that it’s clogged pretty badly (or it’s really old), feel free to replace this filter completely.
Step Eight: Install Your Filter on New Pump
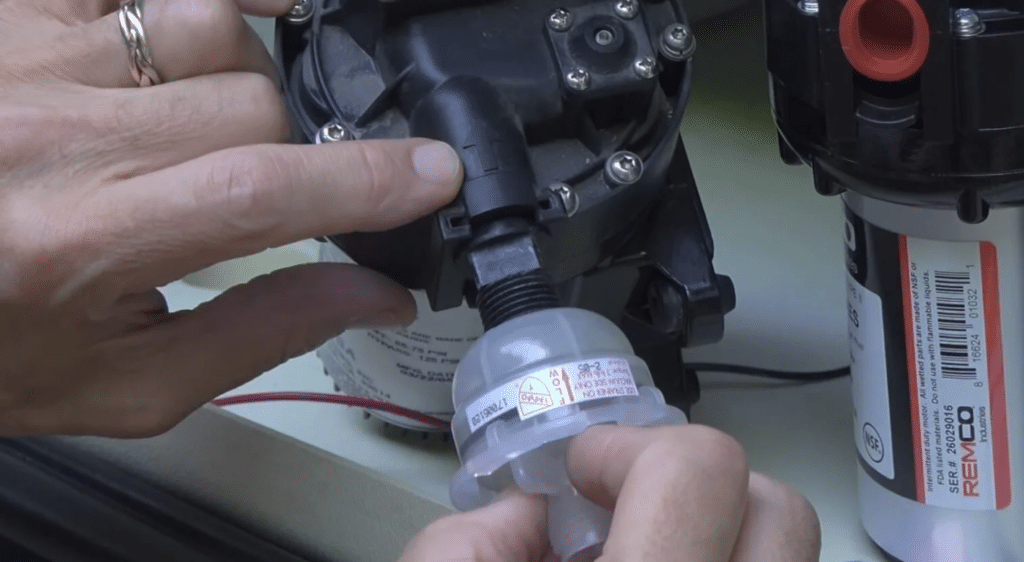
The pump and the filter should have arrows indicating the direction of the water flow. Install the filter on the side of the pump that matches the direction of the arrow (you want both arrows pointing in the same direction).
To reinstall this, use a crescent wrench to screw the fitting from the new pump into the filter. Remove the red cap from the pump and firmly press and twist it into the fitting where the cap was. Press the clip down to lock it into place. Repeat this step with the fitting on the other side of the pump.
Step Nine: Strip Wires and Crimp-on Connectors (for the Latching Controller)
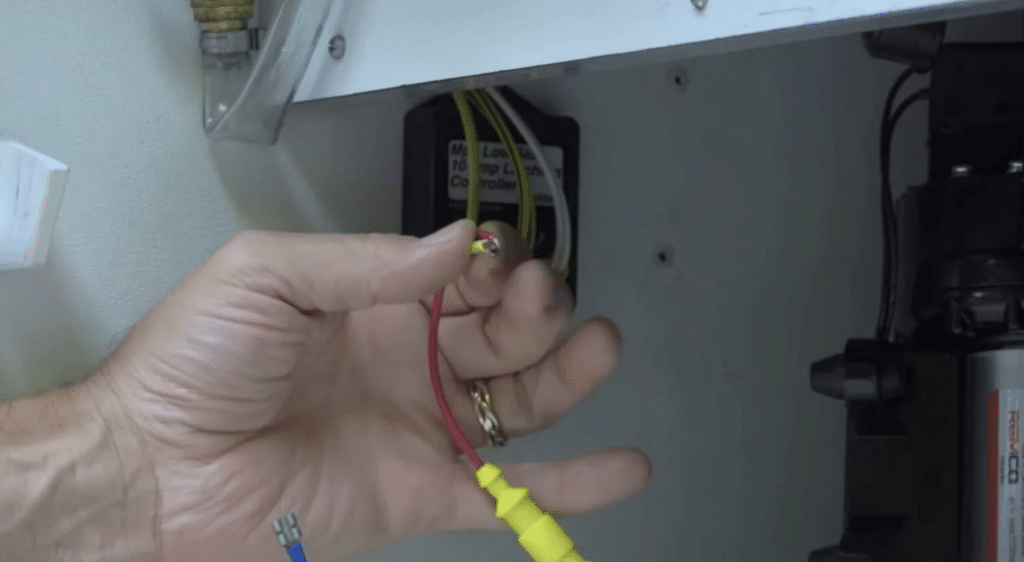
Locate the pump’s black ground wire and strip the insulation from the wire tip before crimping it onto the spade connector. Gently tug the connector to ensure a snug crimp.
Then, strip the previously snipped red (or yellow) wire along with the red (or yellow) wire on the new pump. Twist the exposed ends of these wires together before crimping them on a spade connector. Tug gently to ensure a snug connection.
Step Ten: Mount Pump into RV with the Existing Screw Holes
There’s no need to change up the location of your new water pump! Depending on the replacement you choose, you should be able to slide it right back in where your old water pump was. Mount the new pump with four screws.
Step Eleven: Connect Inlet and Outlet Water Lines to Pump
Reconnect both the inlet and outlet water lines into the new pump by screwing them firmly. Be gentle with these fittings as they’re designed to be finger tightened (meaning you shouldn’t have to use any tools).
Step Twelve: Connect the Pump Wires to the Latching Controller
Reconnect the positive lead (red or yellow) wire onto the latching controller followed by the black ground wire.
Step Thirteen: Re-Install the Water Pump Fuse and Turn on Your Water Pump
Return the fuse you removed from the electrical panel to it’s original location.
Step Fourteen: Turn on the Water to Ensure It’s Operating Correctly
You should be able to turn on the water pump at one of the switches now. To check the function of your new pump, turn on a faucet. After it sputters for a few seconds (this is normal as it’s releasing air from the water line) you should see consistent water pressure and a smooth flow. The water should also stop when you turn off the faucet.
Step Fifteen: Check Water Connection for Leaks
Once you have the water running smoothly, close the faucets but keep your water pump turned on. With the system being pressurized, check all connections at the pump and inline filter for leaks. Tighten as needed!
Final Thoughts
And that’s all there is to it – good luck on your adventures, and if you found this helpful, please share it with your fellow RVers!
If you have any questions on which pump you should buy or how to install it, drop a comment down below and we’ll get back to you.
Looking for more RV accessories? Check out these posts:
- 10 Best RV Outdoor Rugs for Camping in Comfort & Style
- Best RV Mattresses in 2022 Reviewed & Compared
- 50+ Best RV Accessories (According To The Experts)
- The Smallest Portable Air Conditioners for RVs & Tiny Spaces
- The 5 Best RV Sewer Hoses (That Won’t Leak On You)
- 5 Best RV Sewer Hose Support Options to Avoid Accidents